Monday, March 4, 2013

Change it, change it good!

I have not posted anything since before Valentine's Day!  Aah! But for a pretty good reason!  I have been working on Listfully Blissful's new home and new name!  Yes, you read that right...I am moving. Small confession here:  the crafty/diy side of this bloggy world, I've got down;  it's the techie department that is a serious mental strain for me!  Not the worst confession ever, but I hope you will be patient as I figure things out!  
So with that said I'm excited to introduce my new craft home!  Find it, Make it, Love it!

Hop over and check it out!  I've made some improvements to the overall site, still going on....) but the best improvement by far is my new partner! My darling sister in law Steffany is now on board with Find it, Make it, Love it!  And let me tell you, she is creativity at it's finest. I adore her and I know you will too!  We've got so many plans and ideas we can't wait to share!  We are even going be doing a bunch of video tutorials to go along with many projects.  It's going to be AWESOME!

So please click on over to Find it, Make it, Love it  and check it out!  And as always, thanks for reading and supporting Listfully Blissful.  I really think the best is yet to come : )

Thursday, February 7, 2013

Felt roses and a Valentine frame for easy decor

I wanted something red to put on my candlestick for Valentines day.  So I made this little felt rosette ball that fit perfectly.  Bust out your hot glue gun and that felt from the basement and this project is done in like 30 minutes!  (Remember how these glass blocks were THE craft to make a few years ago?  Yeah, I still put mine out...do you have one too??: )
Tennis balls!  Who knew?  I will admit I don't remember the prices exactly, but I went to get some Stryrofoam balls one day and they were kind of pricey!  A 3 pack of tennis balls was only $3 or $4, and worked great for this project!


This other project was even easier!  Raid your frame stash and paper stash and 
pick up some $.97 glitter hearts at Walmart:


The glitter hearts even came with the little sticky strip!  Bonus!!  I think it turned out pretty cute : ) 

Monday, February 4, 2013

What's been going on here + cute owl Valentine

So I have a few projects I meant to have posted by now!  BUT here's what the last couple weeks have looked like for us:
Needless to say, I've been dragging a bit.  I am seriously happy to say things are back to normal!  Isn't it crazy how bad things tend to happen all at the same time?  Our bad run seems to be over : )  Well, our kitchen tile still needs to be replaced but that's going to have to wait for our wallets to catch up.  Um, it's also really cold still; but that too has to wait....I sure hope your January was a little better than ours : )
Anyway... on with the cute owl Valentine!  My second grader needed to take a Show and Teach for her whole school class, so it needed to be easy but cute!  I found these fun little owls at a kid craft roundup at Second Chance to Dream.  There is a downloadable template for them too! 


Aren't they cute?!  My 8 year old had no trouble showing and teaching these and they were a hit!  I did feet on one and then decided I did not want to cut out 24 pair - they were pretty cute without too : )

Thursday, January 24, 2013

Hot glue gun stand

This is one my favorite "Ohhhh"  tips.  You know, the kind of tip that makes you shake your head, roll your eyes and maybe even slap your palm to your forehead when you hear it?  This is like craft life changing!  At least it was for me!  Maybe I'm the last one to figure this out : ) 

When using your glue gun, set it on a silicone heat pad!


That's it!  The glue peels right off it, it's heat resistant, AND flexible for easy storage.  Did you just shake your head, roll your eyes or slap your palm to your forehead? (Because it's so craft life changing or because you've known this for years?!  ha ha ; )

Check out my glue gun stand before I learned this little tip:


That glue was permanent on the plate and my glue gun would tip over all the time.  See why this was such awesome news to me?  And look at that glue gun-it is very well used and loved : )

I hope you are having a healthy and happy January!  We've had our share of sickness around here!  Man, I'm craving some warm weather-can't wait for SPRING!!

Friday, January 18, 2013

DIY Photo Backdrop

I have been playing photographer for about as long as I can remember having any sort of camera.  Then last year, I got my first SLR camera for my birthday!  So over the last year, I have read multiple books from the library, scoured photography blogs, and taken a couple light classes.  I have a lot to learn still, but I love it!  Photography is so fun and creative and beautiful!  So here's my deal now,  I'm too cheap frugal do it myself minded to pay someone to take my kids pictures.  I really want to do it!  I have a decent camera and all!  What I don't have is a lot of experience or a proper studio.  That's where this post comes in!  I'm going to show you how I made my own photo backdrops, on the cheap!
This one is a water heater box.  Any large piece of cardboard would work!


I used some big straws and packing tape 
to stabilize the fold, just so it wouldn't flop too much.


The cute white bead board is  paintable wallpaper I got from Lowe's.  Yes, wallpaper!  Have you heard about this? It's going to make its way onto a wall soon, but it works great as a backdrop for now!
 I literally taped the bead board wallpaper to the cardboard, then cut a banner using lots of different papers and strung it with bakers twine.  And Ta-Da!
Welcome to Melanie's photo studio!
So like any 5 year old photo shoot, there are lots of blurry, too silly, or too wiggly pictures; BUT there are also these!!:


 While I realize I am no pro., I'm still pretty darn happy with the outcome : )

BACKDROP #2
 These are some keepers:


This is the BIG picture:
Melanie's photography studio is totally unprofessional with bed head blondies running all around!  I actually have this picture stuck on my magnet board display in our family room because I think it's so funny!  This backdrop is also just a big piece of cardboard.  It's one of those tri-fold science project boards, I got it at Hobby Lobby.  Then I taped this barnwood butcher paper to it (also from Hobby Lobby.)  I have absolutely got the most bang for my buck with that butcher paper. 
 See here, here, and here. : )
I'm thinking about doing some sort of more permanent backdrop that would be interchangeable.  Different wall papers, fabrics, or butcher paper, or real wood!  Maybe I'll get to that by next year's birthdays.  And hopefully my photography skills will get better too. : )

Partying here:  Craft-o-Maniac

Thursday, January 17, 2013

Giant Masonite Chalkboard

We have this great central wall in our kitchen but it's right next to the doorway into the laundry/mud room.   At the end of the laundry room is our pantry.  The garage door is also just on the other side of this doorway,  and there's a door into the backyard across from that.   So we go in and out of that room too often to keep this door shut.  However, when it's open it covers this great kitchen wall space.

 A pocket door would be perfect here, but would be a more expensive project than I want.  I finally just took the door off and put up the chalkboard I've been picturing there for months!
 I took a large piece of Masonite we had sitting in our garage and painted it with chalkboard paint.  I did 3 coats.  With the help of my sweet husband, we screwed it right to the wall.  Masonite is inexpensive and pretty light!  It can also be moved if I choose in the future.  I added the cute chicken wire magazine rack for the daily mail, coupons and now the top one is just for grocery, menu, and recipes on my two week menu.


  I'm happy to report all my dreams have come true with this wall!   A huge chalkboard is so fun in the kitchen, with endless uses really!  The magazine rack filled with papers is not the prettiest, but this is real life after all; and there are so many papers that come and go right?  This helps keep them off the counter anyway : )
Here's a few shots of what's been on our chalkboard over the past month.  (We have 4 out of 6 birthdays in Dec. and Jan.)


(Leftover night!  That was my funny husband;  he's actually great about whatever might be for dinner : )


Monday, January 14, 2013

What to do with all the kids art?

I'm excited to show you a fun project that has been on my list for a long time!  
But...let me first share with you one of my quirks that has made this project kind of a big deal to me.  We all have certain things that we must have a certain way right?  We're all a little weird about SOMETHING (I hope : )  Well this is one of mine.  My fridge cannot have stuff on it.  It makes me crazy!  You won't see wedding announcements, birthday cards, appointment reminders, or precious works of art by the little artists who live here.  I know, it's kind of weird!  Refrigerators are like the most central part of a home, making them excellent to stick all that stuff to; but I can't do it!  All that's on there are these fun alphabet magnets that somehow create a perfect balance in my world of clean fridge-ness!
This is how it looks all the time!  (Except when someone changes the message.)  You can see there is stuff on the one side, which is great and helpful, and tolerated by my quirk : )
So because I'm weird, my poor children don't get to plaster their art all over the beloved fridge.  I had to come up with another way to display their many projects and pictures.  (And there are many!!!)  
 Here was plan A:


Hmmm... Not so special.  Are we all thinking the same thing?  THIS doesn't drive you crazy but some paper on the front of your fridge does?  Quirks don't always make sense, right?
Here is Plan B:


This is a wall in our garage, right by the door.  I found this awesome butcher paper at Hobby Lobby (see my other uses for it here and here) and covered the unpainted wall to make a pretty backdrop. I just used a staple gun to put the paper up.   Then I took all the piles and pinned the best projects up for display.  We recycled the rest : ).
 Ta-Da!!
 It's pretty full so we'll need to switch things out here and there as more art comes in.  I've got to say, this is one of may FAVORITE projects ever!  It makes me so happy to see all the girls fun art every day as we come and go.  It has been the perfect solution for us!  Kids love to show their work and we as parents love to see it!  (And my refrigerator stays clean: )  I'll leave you with some of my favorites and one before and after shot, just for fun!

Thanks for coming by!!

Linking up at Gingersnap Crafts.

Friday, January 11, 2013

Home made Cream of Wheat {plus giveaway winner!!!}

First I want to thank everyone for your sweet comments on my Wood Connection guest post!  It's been a blast for me to host my first give away and I thank you all for being a part of it!  The winner of the $25 Wood Connection Gift Certificate is....
Ali Childs!!  
Congratulations Ali!  Please email me your address and I will send your gift certificate ASAP!
Thanks again everyone for entering!

Now on with the Cream of Wheat!  My husband and I discovered this a few years ago when we went to buy some Cream of Wheat and then didn't because it's expensive!! It's just ground up wheat right?  Wheat is so inexpensive.  We found some info. online and had to give it a try!  And guess what?!  It's amazingly easy and so cheap to make!  The only catch is you do need a wheat grinder of some sort.
Here's the how to:
Grind 3/4 to 1 C. of wheat.
Bring 4-5 cups of water to a boil and slowly pour the ground wheat into the water; whisking as you add the wheat.  Do not turn away for any of the cooking time!  If it boils over you might cry because it makes such a mess.  Just whisk and boil until it's as thick as you want it.  You can add a dash of salt like the boxed cream of wheat calls for, but I always forget and it's fine.
 Then serve it up warm and creamy (and even healthy!) We add brown sugar and milk to ours and usually eat it with a piece of toast.  My kids love it!  They ask for it at least once a week and it's quick enough to make that I can even do it on a school day!  It's a cozy kind of breakfast especially in cold and snowy weather.

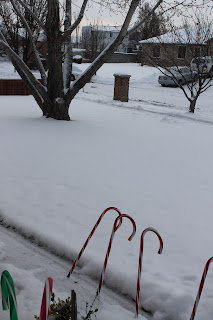
The views out my front door and back door for the past month-lots of cream of wheat mornings!!  (I have since pulled out the candy canes.)  
Last tip for this recipe:  Don't skip wiping down the table and counters after this breakfast.  Have you ever had to clean up dried cream of wheat?  We're talking power tools!  It's crazy!  And yet somehow edible : ) And tasty : )