Monday, February 13, 2012

Valentine Love

Every year I just keep it low key for Valentines Day...until the day before.  Then I decide I should do loads of wonderful treats and surprises for the ones I love most.  Being the day before however, time is not on my side.  Here's what I came up with!


Who doesn't have the staples for Rice krispie treats in the pantry at all times?  (Okay, I didn't...I had to make a run to the store for marshmallows)  Still, basic enough for my plans.  The Rice Krispie Hershey Kiss was super easy.  Take a ball of the mixture, while it's still warmish.
 Mold it the best you can into that Hershey kiss shape.  This step is much easier with slightly wet hands.
 Wrap it it plastic wrap to keep it from getting dry and hard and less yummy.
 Then wrap it in aluminum foil.  I found it was easiest to wrap one whole side, then the other.  Then fold the rest under; all the while shaping and smooshing to your liking.
 Add a little tag of loving words,
 then hide it and sneak it into husbands lunch on Valentines Day!
For the kids heart rice krispie treats I just used a muffin tin I have in heart shapes, but it would be easy to hand mold hearts for this too.  I added some red hots into the little bag, tied it with ribbon and added a note.  I hid these and will slip them into the kids lunches.   Just enough for me to be so excited for the day of love!


Monday, February 6, 2012

Love potion

 I found this love potion label in October on my hunt for apothecary labels and I knew it would make its way into my Valentine decor.  (Check out kmckaydesigns.com for the label, it's from her Halloween apothecary labels.)
  I simply filled a fun jar with water and red food coloring then glued the love potion label onto the bottle.  I added a little lace to the top.  I think it turned out pretty fun! 
These are the glasses from my Junior prom.  I haven't been able to part with them because it was my first date with my sweet hubby.  (ooohh...cute)  However, they are not something I want on permanent display so I get them out for Valentines Day.  Add some red hots, and a vase with ribbon and call it my Valentine Decor!


Monday, January 23, 2012

It's Birthday season!

We have 4 out of 6 birthdays within a month in our sweet family; and all around Christmas.  Isn't that convenient?  (cue sarcasm...) Timing and having babies has not really worked out in our favor.   My birthday is 5 days before Christmas and I never liked it much, then we went and had our first baby   seven days before Christmas.   The next two birthdays are Jan. 10 and Jan. 20.  Needless to say, I'm birthday-ed out by Jan 21.   Birthday parties are not my thing, especially with all that's going on already with Christmas, so here is what I do instead to make the day special.  (Please forgive my picture taking skills, I am learning to use my new dslr camera...)

I put streamers up all over the kitchen the night before.  This creates the "wow" factor when they come down the stairs in the morning.  I also decorate our two kitchen shelves with a picture from each past birthday and anything else I can rummage up to make it personalized.  My girls have loved to see these simple surprises. See the cute birthday subway art?  I got it from   eighteen25.blogspot.com, they have awesome free subway art for all seasons.
I decorated with a feather boa and sparkly things for Anni


I used some bugs from her plastic bug collection and flowers to fit Ivie's personality.

For Lila, I set up crayons and some of her most recent artwork.

Each year I have them make a crown out of paper and we write their age really big on it.  This way we know which birthday it was:)  Plus they love making their crown!
This year I added this little gem!  Just a paper birthday banner.  I simply bought some heavy duty glitter and textured scrapbook paper, (all on clearance-bonus!) and made a triangle template from a cereal box to trace.  Then I used the Cricut to cut the letters for "Happy Birthday."  I also threw in some cupcake liners that I snipped, flattened and added a button.  I sewed the triangles (yes, with my sewing machine :) onto some ribbon.  I plan to re- and re-use this for every birthday!


This year I also tried taking a Burger King crown and making it re-usable.  I traced and covered it with white construction paper

Then I used contac paper to laminate it.  Have you tried this stuff?  I have used it loads and it's only like 5 bucks for a whole roll.


Now each girl can color and decorate as they please using these dry erase crayons!  It worked out fabulously!


The Birthday plate!  We had a red one when I was little and I always thought it was so fun.  It only gets used by the birthday girl on her birthday.

(not the BK crown, I hadn't thought of it yet)

(BK crown:)

(same BK crown:)
This years crowns!  We do always have a family party with cake and ice cream, or scones, or brownies, whatever the birthday girl chooses.  It all makes for a fun day! And that finishes up our Birthday season!

Wednesday, January 4, 2012

Homemade Laundry Detergent

We are always looking for ways to save some money, which means we try all sorts of things homemade.  We always laugh when we say someone else is weird, because really; we are most likely the weird ones.  So since today is laundry day, well a laundry day, (it never ends...)  I thought we'd share our HOMEMADE laundry detergent. This is absolutely a money saver and really easy!
Here's all you need:

4 cups hot tap water
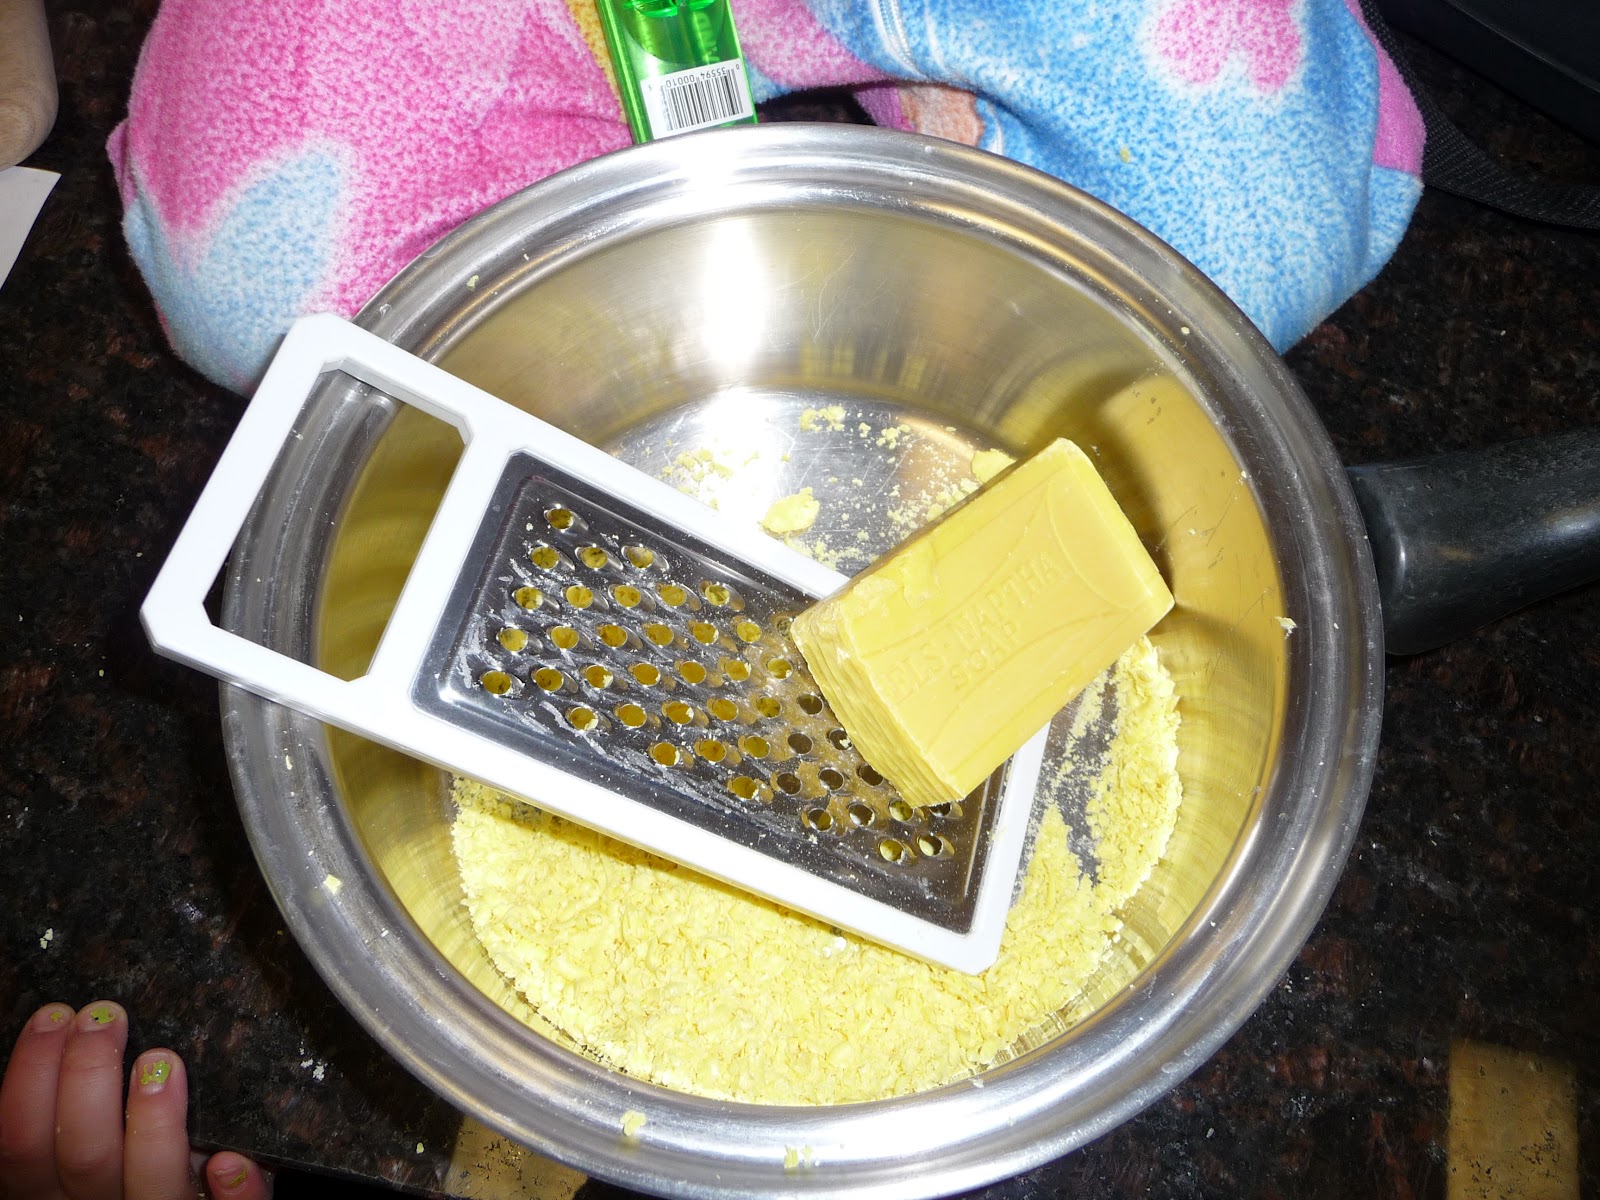
1 Fels-Naptha soap bar
1 cup Arm and Hammer Super Washing Soda
1/2 cup Borax

All of these ingredients are very inexpensive.
Grate Fels-Naptha and add to saucepan with water.  Stir continually on medium low heat until soap is melted and dissolved.

 Fill a 5 gallon bucket half full with hot tap water.   We use a 5 gallon gas container.  We thought it would make pouring easier than a bucket.  After using it for 3-4 batches though, we think a 5 gallon bucket might better so you can stir it. It gets a little lumpy.  We (mostly Jay because it's heavy) just shake the gas container to stir.  Next, add melted soap, washing soda and Borax.  Stir well until all powder is dissolved.  Fill bucket to top with more hot  water.  Stir (or shake) cover and let sit overnight to thicken.
 Stir again, then fill a used laundry dispenser with your new laundry detergent!  You can dilute it more if you choose by adding half water, half detergent to your actual laundry dispenser. I like it more concentrated, but that's just my preference:)  Shake well before each use because it does get lumpy.

You can add 10-15 drops of essential oil per 2 gallons once soap has cooled.  We never have though because we like the smell of Fels-Naptha.  It's kind of a citrus, clean smell. (I actually use a ratio of 3/4 homemade and 1/4 Gain in each load because I love how Gain makes our clothes smell; and 1/4 Gain is plenty to scent my laundry how I like:)
USE:   top load machine-1/3 cup per load.  Front load machine-1/4 cup per load
Each batch lasts me about 8 months!

NOTE:  It has to be Arm and Hammer "Super Washing Soda."  Baking soda, or Arm and Hammer Detergent will not work.  It has to be sodium carbonate.
Yeild:  makes 10 gallons

Thursday, December 1, 2011

Whimsical Christmas wreath


This is a fun wreath I put together last Christmas.  It reminds me of Whoville.   I love whimsical Christmas decor!  The wreath is so simple and cheap!  I got a wreath form at the Dollar store, then just cut and tied tulle all around it.  I used about 1 yard of red tulle and one yard of green.  I cut it into strips about 3 inches wide and 10 inches long.  I like it pretty full, so I tied and bunched until it covered the entire wreath form.  Then I added a few ribbon pieces throughout to add that little extra.  I love how it turned out! I did a smaller one for Halloween too, check it out here.


Thursday, November 24, 2011

Happy Thanksgiving!

 
A few fun turkey time ideas my kids had fun with this month:
We did the good old trace your hand and color like a turkey (does that ever get old-I don't think so :).  We printed a turkey from the internet and decorated it with beans.  The girls loved that!  We used the words THANKFUL and BLESSINGS to come up with things we're thankful for using each letter.  ( I can't remember the real English class term for that....)
 This is a fun one!  Maybe I'm the last to know about this trick, but this was the first time I have ever done it.  Find a good leaf in the yard and place it face down on the table, then simply place a piece of paper over it and color with a peeled crayon.  I love, loved how these turned out!
                                                   Happy Thanksgiving!

Tuesday, November 22, 2011

Rain gutter Book Shelves

We have loads of kids books around here and I needed a good way to display some of our more frequent reads.  Something that my 3 year old could easily access, something cute, and inexpensive.  The answer:  Rain gutter book shelves!  These absolutely fit the bill.  They look like crown molding, and are surprisingly sturdy.  

With the help of my husband of course, we had these up in less than an hour.  We just measured and cut to the size we wanted.  If I remember right, this is only one length of rain gutter, cut to 3 shelves!  One length is around $6!  The end caps are $2 or $3 a piece; but the total cost is still very inexpensive.  We used 3 anchors and screws  to attach them to the wall and they have worked perfectly!  I love them so much I think I'm going to put one above each girls bed for their bedtime reading.

Related Posts Plugin for WordPress, Blogger...