Monday, July 2, 2012

Burlap and Lace - Wedding reception!


It's been a crazy few months of little blogging and lots of reception crafting and planning.  I have loads of catch up to do.  My sisters reception turned out BEAUTIFUL!  It was awesome to see months of ideas and plans finally come to life! (It was also stressful, man what a busy day!)  I think we were able to really capture my sisters vision and make it real.  I'll post some tutorials and details over the next couple weeks, but here's the re-cap!
This truck has been in the plans from the beginning, I'm absolutely in love with it (and that guy driving it : )

The cake table, which were cheesecakes.  Barn doors, burlap, lace, lemons.


Dollar store doily banner


Meckenna (bride) didn't want real flowers on the cakes, so after multiple tries and ideas, this is what we chose.  I made these burlap flowers the same way I made the fabric head band flowers here.  We love how they turned out!


Billy balls, and Baby's breath

Awesome old crate with bunches of flowers.  Yellow Alstromeria, white Daisies, and Baby's breath


Cards went in this birdcage.


Awesome hanging balls which we did NOT make.  They were huge and gorgeous and I was told the biggest one took about 8 hours to make.  So glad we were able to rent them for like $30!  They looked so fabulous!


These were the centerpieces on each table.  Mason jars wrapped in burlap and lace with a vintage key tied with some jute.  I designed the frames, my mom cut and routed them, Meckenna painted them, then I roughed them up to finish.  Love them!

My oldest, Adrianne, always happy to model for me.  I made the girls head bands to match their skirts and the wedding colors.
My talented mom made the girls skirts, and I made the yellow lace leggings (that barely survived the night, on a side note : ) They looked so cute!

The signing table.

Where the truck was posed.  Gifts in back, Otter pops in front.  Notice the farm/country atmosphere and barn in the background.  This place is amazing!


The bride's birdcage veil that she designed and made.  Beautiful!

Billy ball boutonniere.

The view behind the tables, awesome truck and barn.  Such a great place!  

I forgot to take a good picture of the Bride's bouquet.  I did all the flowers and the bouquet was the most fun!  It had a big vintage brooch on the front.  Hopefully the real photographer caught a good picture of it.

This is the best picture I have of the Bridesmaid's dresses.

See the bouquet and the girls skirts and leggings!  (And most of us making weird faces for this candid shot..)

Another funny candid shot, but look at the super awesome background!
  Planning was a lot of fun, (and work)  and such a great creative outlet for me, but I will say I'm so glad it's over!  Everything was beautiful including the Bride and Groom, and they will now live happily ever after! 


Monday, May 14, 2012

Junk lamp makeover

We needed more light in our living room so I have been lamp shopping for a while.  Turns out, lamps are kind of expensive.  I needed cheap and ugly but with potential!  After a few thrift store runs with no success I discovered this in my parents basement:
Unfortunately, this is the best before picture I took.  The lamp shade had that accordion fabric cover on it, it was a breeze to pull off.  I cleaned it really good, see how shiny it is : )  Then I primed it and painted it this fabulous yellow!
I scuffed it up a bit to get the shabby look I wanted.  Then I used a gloss varnish to seal it and make it just the right shinyness : )

Now for the shade.  I got some inexpensive fabric and traced the lamp shade by rolling it over the fabric and marking with a pencil on the top and bottom of the shade.  Then I cut it, leaving about a half inch extra to sew.   I hemmed the top and bottom, then sewed the two ends together.  It slipped right over the shade.   It needed a little something still, so these fabric rosettes worked perfect!

 See that fun yellow pot?  That was the inspiration for the yellow.
  I am thrilled with how it turned out!  I love a good cheap project : )

Sunday, May 13, 2012

Burlap covered boxes

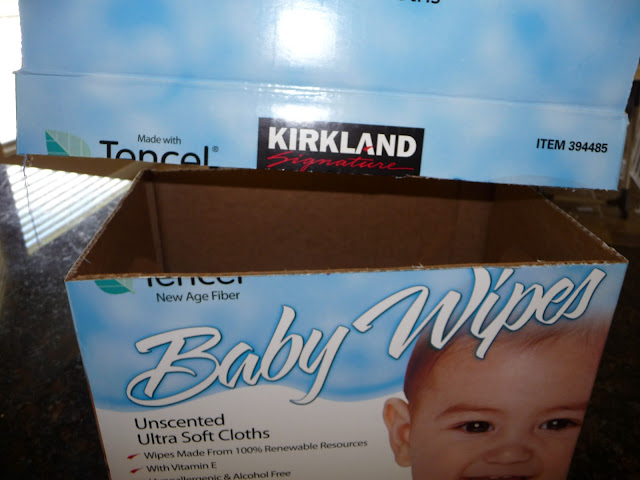
I needed some custom bins to fit into the custom mud room locker set up my talented hubby built.  Rather than shop and measure and shop and measure and then pay a lot of money, I decided to just make some.  I saved some Costco wipes boxes.  I just had to cut the top off and they were a perfect fit.
 
I covered the boxes with this shelf liner contac  paper so the blue wouldn't show through.


 Next, I busted out the ever dependable Mod Podge (mine is from KD craft from like 12 years ago; apparently it will last forever!)  I just cut some burlap to size,  wrapped and glued until the box was covered.
 Then I added some knobs we had laying around that came as extra's for a dresser.  They were white, so I just painted them a dark brown to match the stain of the wood and hot glued them to the center.  Cheap, functional, and cute!
 

 See how the shoes are all straight and not in big piles?  This is not what it usually looks like.  There are kids using it after all,  I straighten it up every now and then : )

Tuesday, April 24, 2012

Free artwork

There are so many choices out there for wall decor,  but none that showcase our family quite like our own art!  I picked a couple of my favorites then I scanned them into the computer and increased the contrast so they showed up darker when printed.  Then I took some mats and frames I had stashed in the basement and gave them a make over -  I covered the mats with some scrapbook paper and gave the frames a coat of black spray paint. 


The girls feel so proud that something they created is framed and on display in our family room! 

Wednesday, April 11, 2012

Fabric flower headband

With four girls, there is a crazy amount of bows and headbands around here.  When I discover a new style I tend to go crazy and make at least one in every color.  (I'll post more bow craziness later : )  For today, I've got to share these little gems!   If I didn't get so terribly overwhelmed in a fabric store I would make loads of these, but this is all I've got for now.  I have made quite a few as gifts for birthday parties, and they have been a hit!   Cute fabrics, endless possibilities, and easy to make!

 
We start with 7-8 large circles (mine are 3 1/4 in.)
and 7-8 small circles (mine are 2 1/2 in.)
I just traced the top end of a cup for the large circles and the bottom end of the cup for the small.
Then to make each circle a petal,  put a dab of hot glue on the wrong side of the fabric
Fold in half,
put another dab of hot glue,
and fold into thirds.
 It will look like this:
 Do this to each circle.  Then take a piece of felt cut into a circle and begin placing and gluing the larger fabric petals onto the felt going in a circle

 Until you get this:
Then just place and glue the smaller fabric petals on top
Add a button to the center (or a cover button, or jewel, or anything :) and hot glue the whole thing right to a headband. 

 Then grab the nearest little girl to put this on and admire! 
Tip: The Dollar Store sells great fabric covered headbands in a pack of 3.  That's where I get mine.  JoAnn's fabric store also has a big selection of colors and sizes.  They are $1.99-$3.99 each.
Have fun trying lots of combinations and colors!  I'm excited to make more!
Related Posts Plugin for WordPress, Blogger...